
🔖 長話短說 🔖
本文將引導你完成以下設定,快速打造現代化的 PowerShell 環境:
- 使用
winget一次性安裝 PowerShell 7、Windows Terminal、Oh My Posh 與 Nerd Font。- 設定 PowerShell 的
$PROFILE,讓終端機啟動時自動載入 Oh My Posh。- 在 Windows Terminal 中設定 Nerd Font 字型以正確顯示主題圖示。
- 文末提供一個全自動安裝腳本,讓你一鍵完成所有設定。
以前看到使用 Mac 的同事的 Terminal 時,總覺得他們的視窗畫面很漂亮。
看到許多人的分享,使用 Cmder 🔗 配合 oh-my-zsh 🔗,也可以在 Windows 中呈現個人喜歡的畫面。
後來,主力使用的 Terminal 改為 Windows Terminal 後,配合 Poweshell 7 後,在使用上沒有遇到特別的需求,沒有特別花心思去找尋相關的套件。
直到前陣子,無意中發現,有人分享 Windwos Terminal 與 Oh My Posh 🔗 的設定,讓我忍不住在個人 Win11 的電腦,進行相關的設定。
套件的安裝與設定
在查找 Oh my posh 的安裝教學中,無意中發現,連 Microsoft 官方,都有設定的教程(Windows 終端機自訂提示設定 | Microsoft Learn 🔗),這算不算官方自已也在推薦。
隨著 CLI 使用習慣,讓我越來越懶的用 GUI 手動進行安裝。
最好可以一口氣,安裝或更新完成 WindowsTerminal、PowerShell 7、OhMyPosh 的套件。
在減少額外安裝作業的考量下,使用 Windows 內建的套件管理器 winget 來安裝所有需要的工具。
# 安裝 Windows Terminal (支援多分頁與自訂外觀)
winget install --id Microsoft.WindowsTerminal --source winget -e

# 安裝 PowerShell 7 (新一代的命令列介面)
winget install --id Microsoft.PowerShell --source winget -e

# 安裝 Oh My Posh (強大的提示符主題引擎)
winget install JanDeDobbeleer.OhMyPosh -e
Windows Terminal 設定
Windows Terminal 支援多個 Shell,像是 Windows PowerShell、PowerShell 等等的 shell。
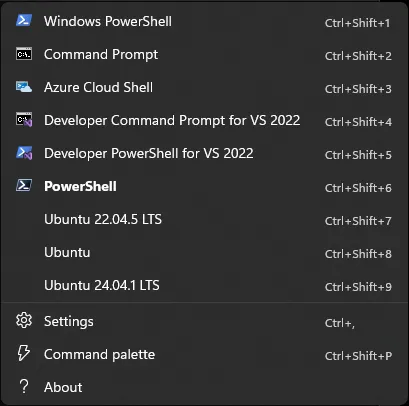
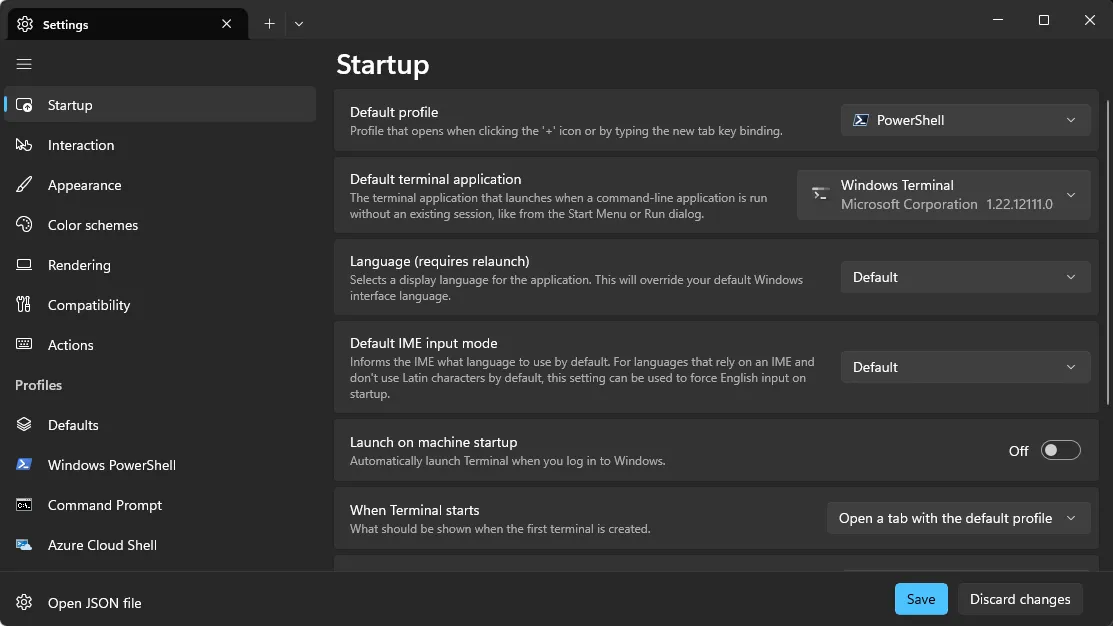
個人期望開啟 Windows Terminal 時,開啟每一個分頁,預設使用 PowerShell。
必須到 Windows Terminal 的 Setting\Startup 中指定使用的 Shell。
設定 PowerShell 使用 Oh My Posh
接下來,就是要讓 Powershell 知道,每次啟用時,都要套用 Oh My Posh 的 Theme。
為此,必須去設定 Powershell 的 profile。
在 Shell 之中,使用以下的指令,呼叫 Notepad 開啟設定檔。
notepad $PROFILE⚠️ 注意:如果出現錯誤訊息,提示找不到檔案,這代表你還沒有設定檔。請執行以下指令來建立一個新的設定檔,然後再重新執行 notepad $PROFILE。
new-item -type file -path $profile -force將以下這行程式碼複製,貼到 profile 檔案中,然後儲存並關閉。
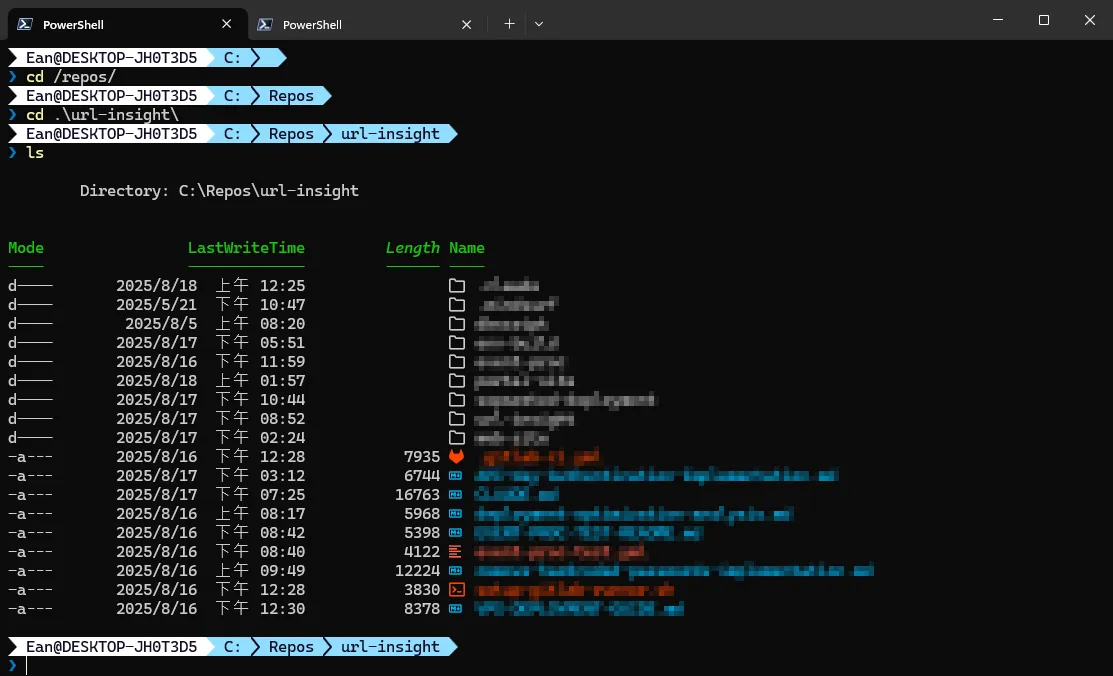
讓 PowerShell 啟動時,就會進行 Oh My Posh 的初始化,並套用 paradox.omp.json 主題。
oh-my-posh init pwsh --config "$env:POSH_THEMES_PATH\paradox.omp.json" | Invoke-Expression完成設定後,重啟 Windows Terminal 後,畫面如下。
在 Windows Terminal 中,使用 Nerd Font
為了讓 Oh My Posh 的主題圖示能正確顯示,必須額外安裝支援 Nerd Font 的字型。
讓我們到 GitHub 中,去下載 Cascadia Code 的 Nerd Font (Releases · microsoft/cascadia-code 🔗),這邊就不多描述手動進行字型的安裝了。
在文章記錄的當下,Cascadia Code 釋出最新版本為 v2407.24.zip,所以直接以此版本進行安裝。
Invoke-WebRequest -Uri "https://github.com/microsoft/cascadia-code/releases/download/v2407.24/CascadiaCode-2407.24.zip" -OutFile "$env:TEMP\CascadiaCode-2407.24.zip"
Expand-Archive "$env:TEMP\CascadiaCode-2407.24.zip" "$env:TEMP\cc" -Force
$shell = New-Object -ComObject Shell.Application
$fonts = $shell.Namespace(0x14)
$fontFiles = Get-ChildItem "$env:TEMP\cc\ttf" -Filter "*.ttf"
$fonts.CopyHere("$env:TEMP\cc\ttf", 0x14)
Remove-Item "$env:TEMP\CascadiaCode-2407.24.zip", "$env:TEMP\cc" -Recurse -Force
Windows Terminal 設定使用 Nerd Font
安裝完成 Cascadia Code 的 Nerd Font
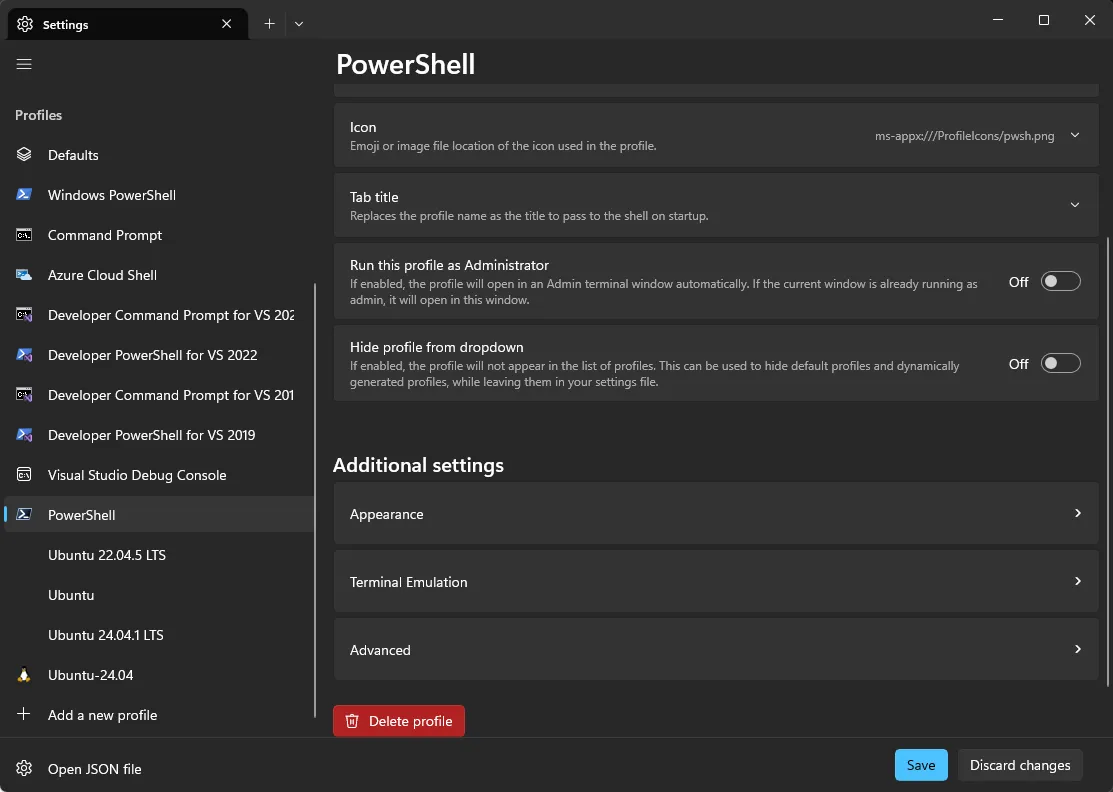
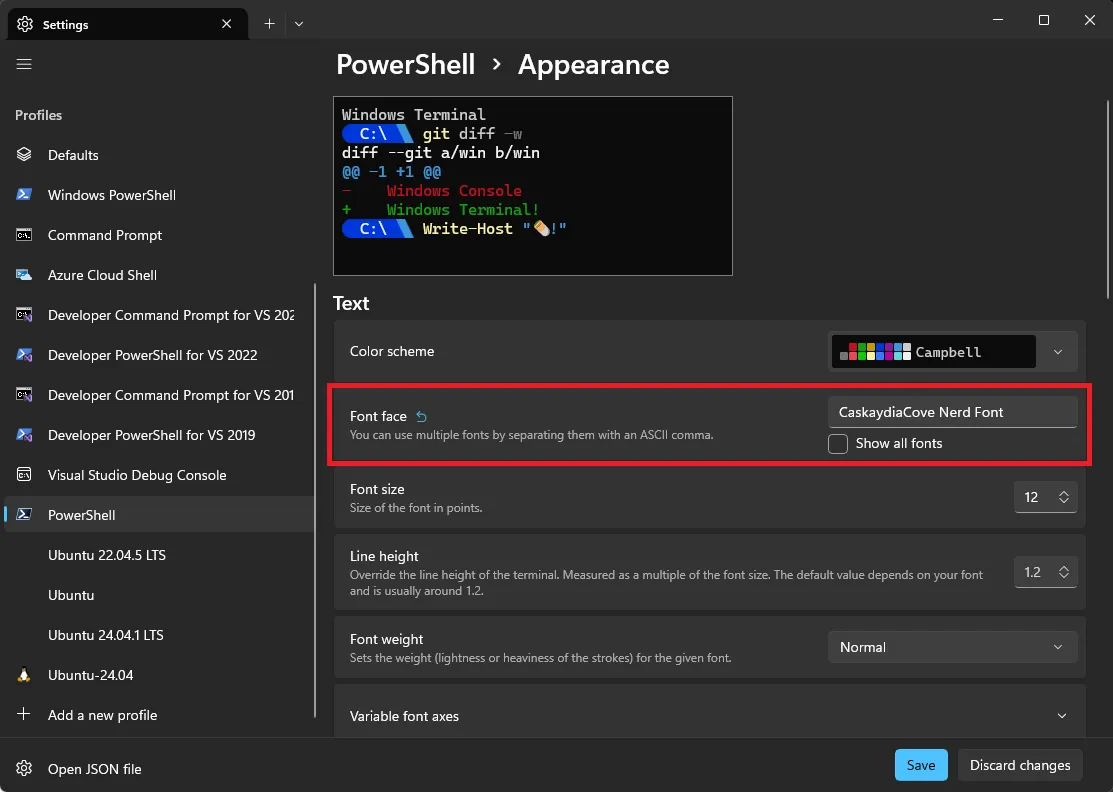
- 開啟 Windows Terminal,點擊頂部標籤列右側的 向下箭頭 (v),然後選擇 「設定」 (或按
Ctrl + ,)。 - 在左側的設定檔清單中,選擇 「PowerShell」 (或是你預設的設定檔)。
- 點擊 「外觀」 標籤頁。
- 在 「字型」 的下拉選單中,找到並選擇
CaskaydiaCove Nerd Font。 - 儲存設定後,重新開啟一個 PowerShell 分頁,你應該就能看到全新的提示符了!
自動安裝腳本
若不想分段進行安裝 CLI 的安裝、設定作業,可以使用以下的 Powershell 腳本,來自動進行安裝。
但安裝後,別忘了,還是要手動到 Windows Terminal 環境,進行設定。
# install-ohmyposh.ps1

Write-Host "🚀 開始安裝作業" -ForegroundColor Cyan

# 1. 安裝所有必要工具
Write-Host "📦 正在安裝 Windows Terminal, PowerShell 7, Oh My Posh..."
winget install --id Microsoft.WindowsTerminal --source winget -e
winget install --id Microsoft.PowerShell --source winget -e
winget install JanDeDobbeleer.OhMyPosh -e

# 2. 明確設定 PowerShell 7 的 Profile 路徑
Write-Host "📝 正在設定 PowerShell 7 Profile..."

# 確保使用 PowerShell 7 的 profile 路徑
$pwsh7ProfilePath = "$env:USERPROFILE\Documents\PowerShell\Microsoft.PowerShell_profile.ps1"
$profileDir = Split-Path $pwsh7ProfilePath -Parent

# 建立目錄(如果不存在)
if (!(Test-Path $profileDir)) {
    New-Item -ItemType Directory -Path $profileDir -Force | Out-Null
    Write-Host "  - 已建立 PowerShell 7 Profile 目錄: $profileDir" -ForegroundColor Yellow
}

# 建立 Profile 檔案(如果不存在)
if (!(Test-Path $pwsh7ProfilePath)) {
    New-Item -ItemType File -Path $pwsh7ProfilePath -Force | Out-Null
    Write-Host "  - 已建立新的 PowerShell 7 Profile 檔案" -ForegroundColor Yellow
}

# 3. 設定 Oh My Posh 啟動指令
$content = @"
# Oh My Posh 設定
oh-my-posh init pwsh --config "`$env:POSH_THEMES_PATH\paradox.omp.json" | Invoke-Expression
"@

Set-Content -Path $pwsh7ProfilePath -Value $content -Encoding UTF8
Write-Host "  - 已將 Oh My Posh 啟動指令寫入 PowerShell 7 Profile" -ForegroundColor Green

# 4. 下載並安裝 Cascadia Code Nerd Font
Write-Host "📦 正在安裝 Cascadia Code Nerd Font..."

try {
    # 下載字體
    $fontUrl = "https://github.com/microsoft/cascadia-code/releases/download/v2407.24/CascadiaCode-2407.24.zip"
    $fontZip = "$env:TEMP\CascadiaCode-2407.24.zip"
    $fontExtractPath = "$env:TEMP\cc"

    Write-Host "  - 正在下載字體檔案..." -ForegroundColor Yellow
    Invoke-WebRequest -Uri $fontUrl -OutFile $fontZip

    Write-Host "  - 正在解壓縮..." -ForegroundColor Yellow
    Expand-Archive $fontZip $fontExtractPath -Force

    # 安裝字體
    Write-Host "  - 正在安裝字體..." -ForegroundColor Yellow
    $shell = New-Object -ComObject Shell.Application
    $fonts = $shell.Namespace(0x14)

    $fontFiles = Get-ChildItem "$fontExtractPath\ttf" -Filter "*.ttf"
    foreach ($fontFile in $fontFiles) {
        $fonts.CopyHere($fontFile.FullName, 0x14)
    }

    # 清理暫存檔案
    Remove-Item $fontZip, $fontExtractPath -Recurse -Force -ErrorAction SilentlyContinue
    Write-Host "  - 字體安裝完成" -ForegroundColor Green
}
catch {
    Write-Host "  ⚠️ 字體安裝失敗: $($_.Exception.Message)" -ForegroundColor Red
    Write-Host "  請手動下載安裝 Cascadia Code Nerd Font" -ForegroundColor Yellow
}

# 5. 顯示設定資訊
Write-Host "`n📋 設定摘要:" -ForegroundColor Cyan
Write-Host "  - PowerShell 7 Profile 位置: $pwsh7ProfilePath"
Write-Host "  - 使用主題: paradox"
Write-Host "  - 字體: Cascadia Code (Nerd Font)"

Write-Host "`n🎯 後續步驟:" -ForegroundColor Yellow
Write-Host "  1. 重新啟動 Windows Terminal"
Write-Host "  2. 確保 Windows Terminal 使用 PowerShell 7 作為預設 shell"
Write-Host "  3. 在 Windows Terminal 設定中將字體改為 'CascadiaCode NF'"

Write-Host "`n✅ 安裝完成!" -ForegroundColor Green
使用方式
- 將腳本儲存為
install-ohmyposh.ps1。 - 在 PowerShell 中,先執行以下指令來允許執行本地腳本:
Set-ExecutionPolicy RemoteSigned -Scope CurrentUser - 執行腳本:
.\install-ohmyposh.ps1
小結
在完成上述的設定作業後,就可以有一個美觀的 Terminal。
若對 Oh My Posh 的主題、Ferd Font 字型,想再進行更改,都有很大的自由發揮空間。
參考資料
▶ 外部文章
💬 留下你的想法
有問題、不同看法,或是你踩過類似的坑?歡迎留言討論,我會盡量回覆。